Calibration : Science Frames
A Science Frame.
As explained earlier, the contents of a photo are :
Raw Photo = Offset + Read Noise + Dark Current + Flat * (Stars + Sky) + Noise,
or :
Raw Photo = Bias master + Dark Master (calibrated with Bias Master) + Flat Master * (Stars + Sky),
or :
Raw Photo = Dark Master (NOT calibrated with Bias Master) + Flat Master * (Stars + Sky),
or :
Stars + Sky = (Raw Photo - Bias - Dark Master (calibrated with Bias Master) ) / Flat Master.
Sky ???
A Science Frame is not only photographing the Stars, but also the Sky. That can be the background light from streets or cities in the neigborhood, or also a gradient due to the Moon.
Is there a way to remove the Sky from your Science Frame ???
In astrophotography : yes, there are ways, but they are abolutely to be avoided for Photometry.
What you can do is move to a mountaintop, avoid high clouds, or move to space.
But even in space there is a problem with the sky, as can be seen in the video's from Ethan Kruse. The video shows the effect of sunlight on the camera's of the TESS satellites, searching for ExoPlanets !
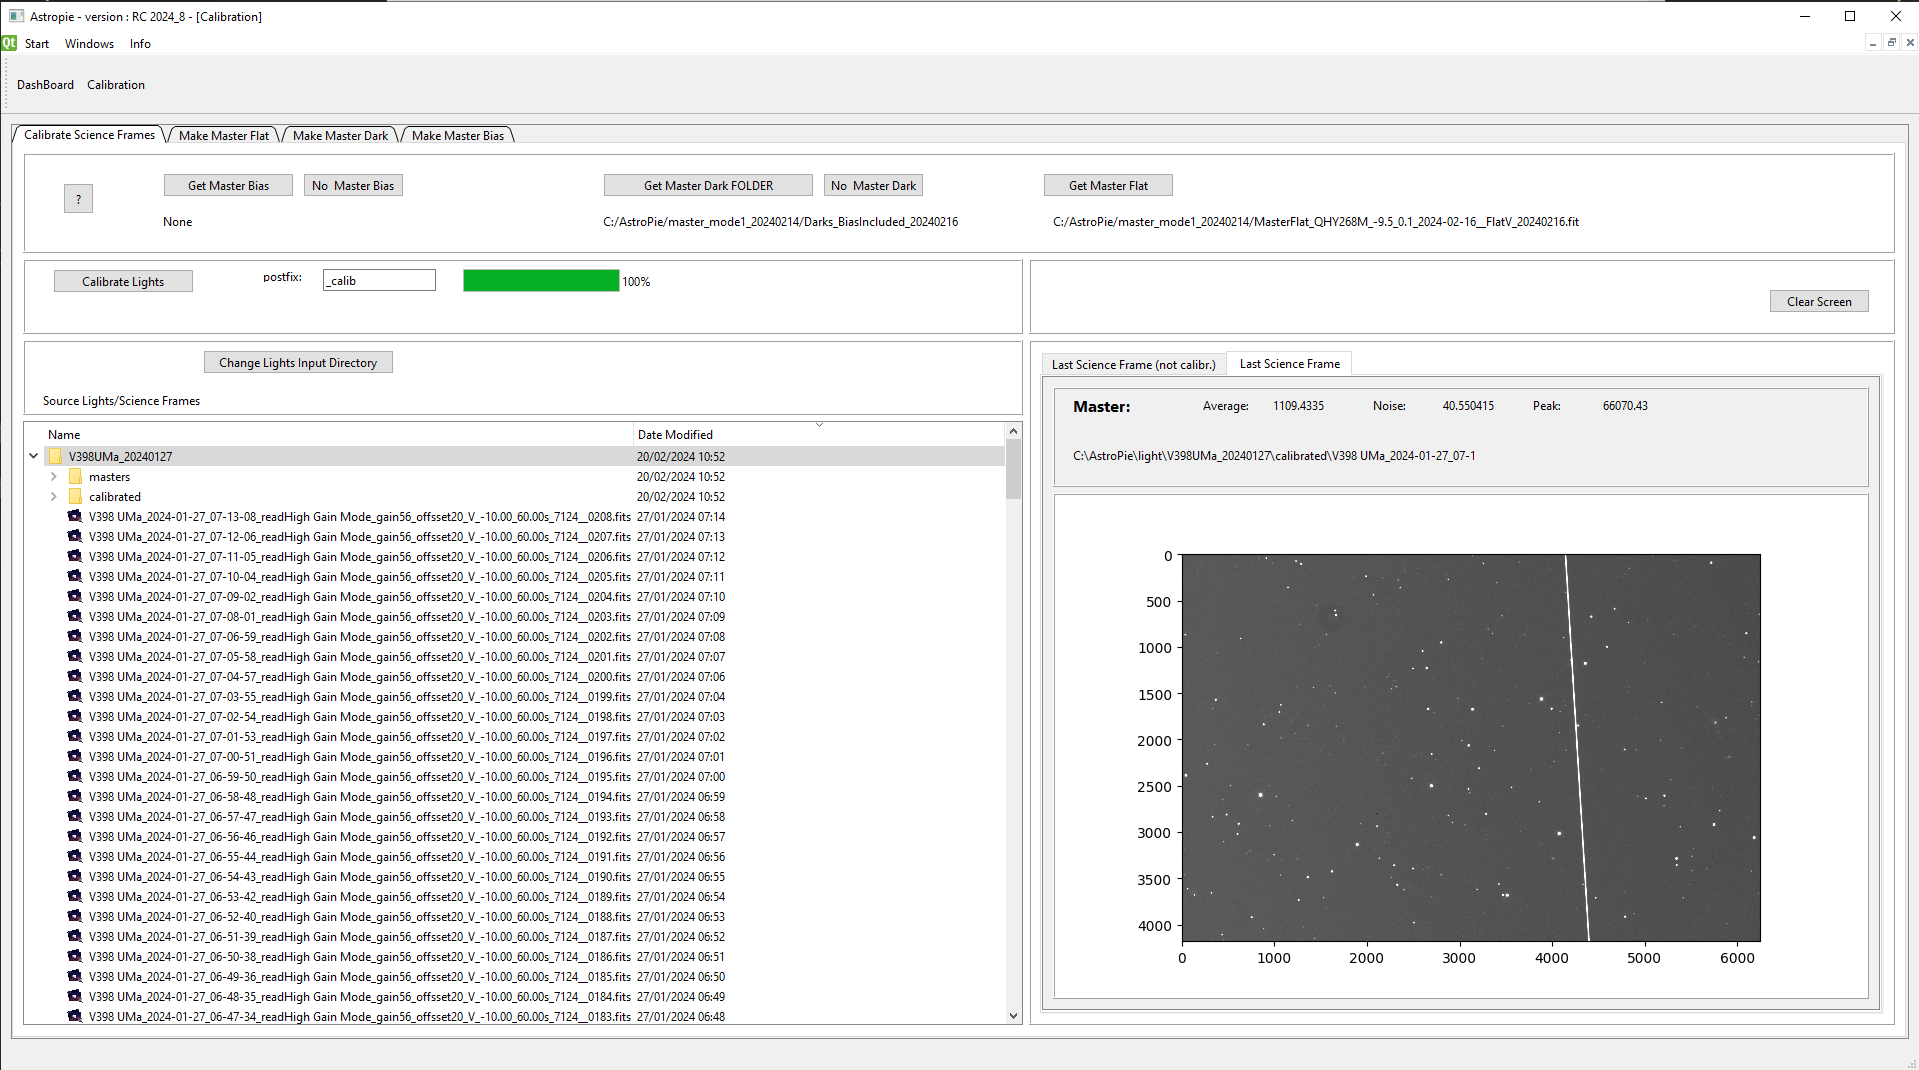
How To Proceed in AstroPie
First select the Masters to be used.
- In this case I have a Dark Master with exact the same exposure time as my light frames, thus I selected NOT to use the Bias : push the button "No Master Bias".
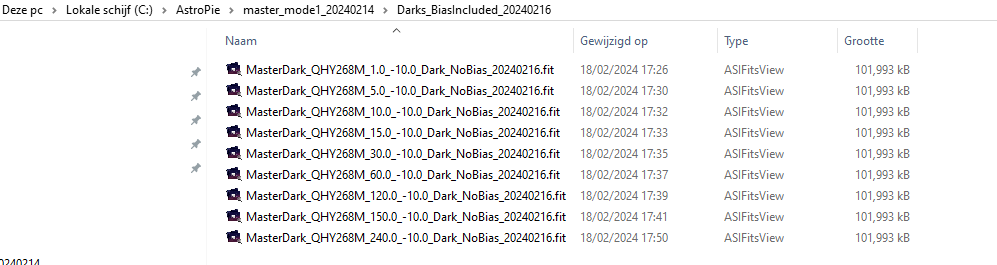
- For the Dark Master, there is a subtility.
Sometimes the directory with the science frames contain photo's with different exposure times. Therefore, AstroPie does not ask you to select a Dark Master with the correct Exposure Time, but it wants you to select a directory where all the Dark Masters for the used camera settings (temperature, gain, offset) are. AstroPie will choose the Dark Master with the correct exposure time.
As no Bias Master has been chosen, this folder contains Dark Masters which have not been corrected with a Bias Master Frame.
These are my Dark Masters :
- For the Flat Master, we choose the V - filter.

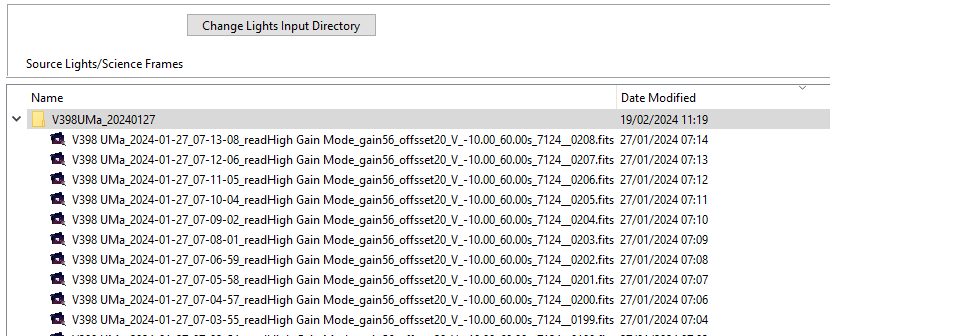
- For the light frames, we have to choose the directory where they are :
Calibrate !
With the postfix you can add a label to the calibrated photo's
A progress bar shows how much work has been done :

Result
- The calibrated frames are all placed in a subdirectory : "calibrated"
- The Master Frames used are all copied to another subdirectory : "masters". If this directory is saved together with the light frames, the exact same calibration can be done again.
- In the right pane an example of the last science frame of the directory is shown. Here we can see that there was a satellite or plane traversing the photo, which is NOT removed.
Remark also the average, noise and peak values, which are not 16-bit any more, but 32 bit floats. That's the reason why a calibrated frame is two times the size of a not calibrated one.
Final Result :